Check out our golf rangefinders by Vovex to elevate your game!
Golf cart batteries are essential for keeping your ride running smoothly on the course. Properly charging 8-volt golf cart batteries ensures optimal performance and longevity. We'll guide you through the process of charging these batteries safely and effectively, helping you maintain your golf cart for years to come.
Many golfers overlook the importance of proper battery maintenance, but it's crucial for avoiding unexpected breakdowns on the green. By following our simple steps, you'll be able to charge your 8-volt golf cart batteries with confidence. We'll cover everything from safety precautions to troubleshooting tips, ensuring you have all the information you need.
Let's dive into the world of golf cart battery charging and keep your cart running at its best. With our expert advice, you'll be zipping around the course worry-free in no time.
Key Takeaways
- Proper charging extends the life of 8-volt golf cart batteries
- Safety precautions are crucial when handling and charging batteries
- Regular maintenance ensures optimal performance on the golf course
Understanding 8 Volt Golf Cart Batteries
Golf cart batteries are essential for powering our rides around the course. 8-volt batteries offer a unique balance of power and efficiency for many golf cart models.
Battery Basics
8-volt golf cart batteries are deep-cycle lead-acid batteries. They're designed to provide steady power over long periods, unlike car batteries that deliver short bursts of energy.
These batteries come in sets of six, creating a 48-volt system for most golf carts. Each battery weighs between 60 to 70 pounds and measures roughly 10 inches in height.
We typically see 8-volt batteries in higher-end golf carts. They offer a good middle ground between 6-volt and 12-volt options in terms of power and lifespan.
Voltage Specifics
The 8-volt rating refers to the nominal voltage of each battery. In reality, a fully charged 8-volt battery can reach up to 8.5 volts.
When charging, these batteries require a specific voltage range. We aim for about 9.2 volts per battery in a series. This means a 48-volt charger for a set of six 8-volt batteries.
Compared to 6-volt batteries, 8-volt options provide more power without significantly increasing weight. This can result in improved performance and range for our golf carts.
Battery Maintenance
Regular maintenance is crucial for 8-volt golf cart batteries. We should check water levels monthly and top up with distilled water when necessary.
Cleaning battery terminals prevents corrosion. A mixture of baking soda and water works well for this task. After cleaning, we apply a thin layer of petroleum jelly to the terminals.
Proper charging habits extend battery life. We avoid deep discharges and always recharge after use. It's best to keep the charge level above 50% to prevent sulfation.
Storing batteries in a cool, dry place when not in use helps preserve their longevity. We disconnect the batteries if the cart won't be used for extended periods.
Preparing for Charging
Proper preparation is crucial when charging 8-volt golf cart batteries. We'll cover essential safety measures, tools needed, and how to inspect your batteries before charging.
Safety First
We always prioritize safety when working with golf cart batteries. Protective gear is a must - we recommend wearing safety goggles and acid-resistant gloves. Ensure the charging area is well-ventilated to disperse any fumes. Keep a fire extinguisher nearby as a precaution.
It's vital to remove any metal jewelry or watches before handling batteries. These can conduct electricity and cause shorts or burns. We also advise having a baking soda solution on hand to neutralize any acid spills quickly.
Necessary Tools and Equipment
To charge 8-volt golf cart batteries effectively, we'll need:
- Battery charger (compatible with 8-volt systems)
- Wire brush for cleaning terminals
- Voltmeter to check battery voltage
- Distilled water for topping up cells
- Wrench set for loosening connections
A hydrometer is useful for checking the specific gravity of the electrolyte. We recommend keeping a flashlight handy to inspect battery cells clearly.
Initial Battery Inspection
Before charging, we thoroughly inspect each battery. Check for any cracks, bulges, or leaks in the casing. These issues require immediate replacement. Clean the terminals and connections with a wire brush to remove corrosion.
We carefully examine the electrolyte levels in each cell. If low, top up with distilled water to just cover the plates. Don't overfill - the levels will rise during charging. Use a voltmeter to measure each battery's voltage. This helps identify any weak or dead cells that may need attention.
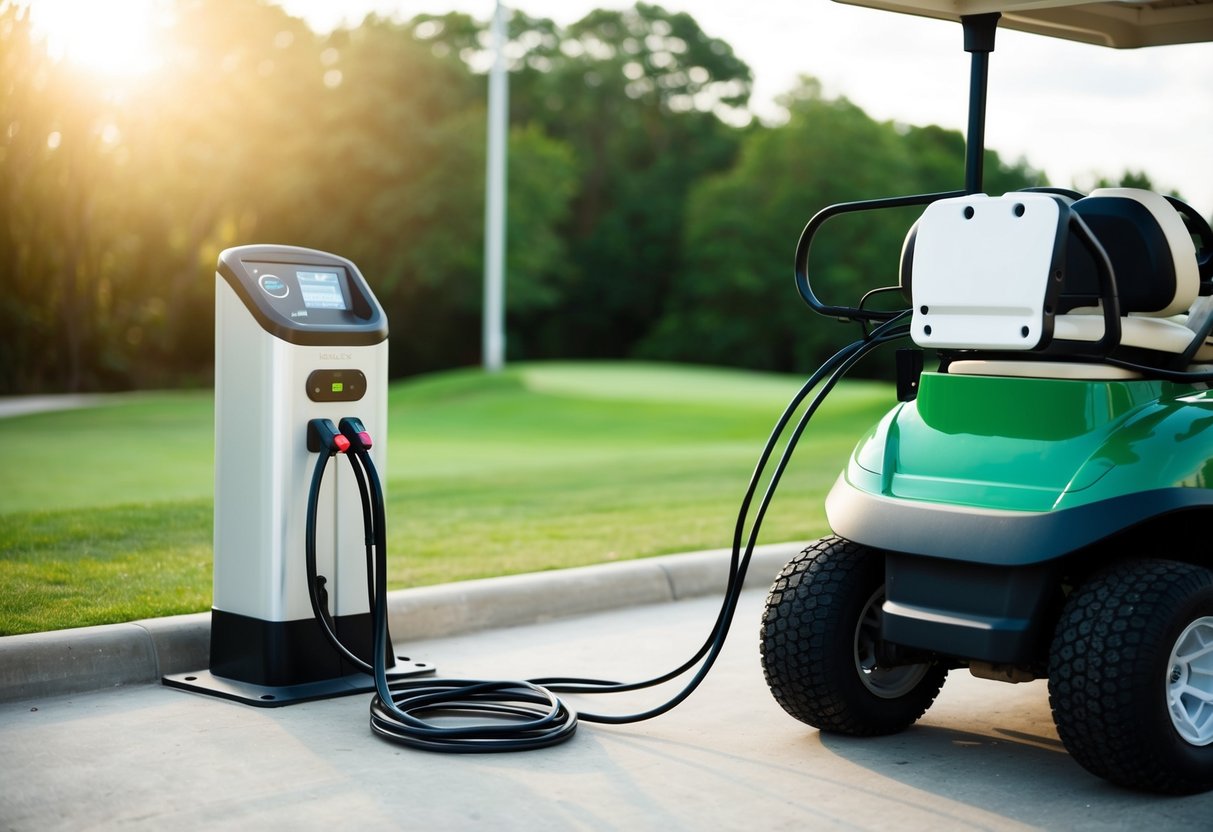
Charging Your Batteries
Properly charging 8-volt golf cart batteries is crucial for maintaining their performance and longevity. We'll walk you through the essential steps and considerations for this important process.
Step-by-Step Charging Process
Start by parking your golf cart in a well-ventilated area. Turn off all accessories and the ignition switch. Open the battery compartment to access the batteries.
Remove the caps from each battery cell and check the water levels. If needed, add distilled water until the plates are covered. Don't overfill, as the electrolyte expands during charging.
Connect the charger's positive (red) lead to the battery pack's positive terminal. Attach the negative (black) lead to the negative terminal. Ensure all connections are secure.
Set the charger to the correct voltage for 8-volt batteries. Initiate the charging cycle and let it run until complete. Most modern chargers will automatically stop when finished.
Setting Up Your Charger
Choose a charger specifically designed for 8-volt golf cart batteries. We recommend using an automatic charger with built-in safety features.
Place the charger on a dry, level surface near an electrical outlet. Ensure it's not in direct sunlight or exposed to the elements.
Check that your outlet can handle the charger's power requirements. A dedicated circuit is ideal to prevent overloading.
Inspect the charger's cables for any signs of wear or damage before each use. Replace them if necessary to maintain safety.
Monitoring Charge Levels
Use a voltmeter to check individual battery voltages before charging. A healthy 8-volt battery should read between 7.7 and 8.3 volts.
During charging, the voltage will rise. A fully charged 8-volt battery typically measures around 8.8 to 9 volts.
Pay attention to the charger's indicators. Most display charging progress and will signal when the process is complete.
Feel the batteries periodically. If they become very hot to the touch, stop charging and investigate the cause.
Keep a log of charging times and frequency. This can help identify potential battery issues early on.
Troubleshooting Common Issues
Charging 8-volt golf cart batteries can sometimes present challenges. Let's explore how to identify and resolve common problems, as well as when it's best to seek professional assistance.
Identifying Problems
We often encounter a few telltale signs of charging issues. If our batteries aren't holding a charge or seem to drain quickly, it's time to investigate. We should check for visible damage, such as cracks or bulges in the battery case. Corroded terminals are another red flag.
It's crucial to use a multimeter to test each battery's voltage. A healthy 8-volt battery should read between 8.1 and 8.3 volts when fully charged. Anything significantly lower indicates a problem.
We must also pay attention to unusual smells or sounds during charging. A rotten egg odor or hissing noise can signal serious issues.
Resolving Charging Issues
Many charging problems have simple solutions. First, we clean the battery terminals with a wire brush and baking soda solution. This removes corrosion that can hinder charging.
We make sure our charger is compatible with 8-volt batteries and functioning correctly. Using the wrong charger can damage our batteries or provide insufficient charge.
If individual batteries are underperforming, we equalize the charge. This process involves a controlled overcharge to balance the electrolyte levels. We do this carefully, following manufacturer guidelines.
For batteries that won't hold a charge, we try a deep cycle. This means fully discharging and then recharging the batteries. It can sometimes rejuvenate them.
When to Seek Professional Help
Despite our best efforts, some issues require expert intervention. If we've tried basic troubleshooting and our batteries still won't charge properly, it's time to call a professional.
We seek help if we notice any of these signs:
- Batteries that are more than 3-5 years old and consistently underperforming
- Visible swelling or leakage from the battery case
- A battery that feels hot to the touch during charging
Professional technicians have specialized equipment to diagnose complex problems. They can perform load tests and check for internal damage that we can't see.
Experts can also safely handle battery replacement if needed. This is crucial, as improper handling of golf cart batteries can be dangerous.
Post-Charging Procedures
Proper procedures after charging your 8-volt golf cart batteries are crucial for safety and longevity. We'll cover the essential steps to disconnect your charger and care for your batteries post-charge.
Disconnecting Your Charger
Once the charging cycle is complete, we need to safely disconnect the charger. First, switch off the charger at the power source. This prevents any sparks when unplugging.
Next, remove the charger clips from the battery terminals. Always detach the negative (black) clip first, followed by the positive (red) clip. This order minimizes the risk of short circuits.
Store the charger in a dry, cool place away from the batteries. Coil the cables neatly to prevent damage and tangling.
Post-Charge Battery Care
After charging, we should inspect the batteries for any signs of damage or corrosion. Clean the terminals with a wire brush if needed, and apply a thin layer of petroleum jelly to prevent future corrosion.
Check the electrolyte levels in each cell if you have flooded lead-acid batteries. Top up with distilled water if necessary, but don't overfill.
Ensure the battery compartment is clean and dry. Remove any debris that might have accumulated during charging.
Lastly, secure all battery connections and double-check that the cart's power is off before storing or using it.
Optimizing Battery Life
Proper care and maintenance are crucial for maximizing the lifespan of 8-volt golf cart batteries. We'll explore key practices to keep your batteries performing optimally for years to come.
Regular Maintenance Tips
We recommend checking the water levels in your batteries monthly. Top them up with distilled water if needed, but don't overfill. Keep the battery terminals clean and free of corrosion. A mixture of baking soda and water works well for cleaning.
Ensure your charger is compatible with 8-volt batteries. Overcharging can damage the cells, so use a charger with an automatic shut-off feature. After each use, charge your batteries promptly. Avoid partial charges, as these can lead to sulfation.
Regularly inspect cables and connections for wear or damage. Replace any frayed wires immediately. Tighten loose connections to prevent power loss and potential damage.
Long-Term Storage Advice
For extended storage periods, we suggest fully charging your batteries before storing them. Disconnect the batteries from the golf cart to prevent parasitic drain. Store them in a cool, dry place away from direct sunlight.
Check the charge level every 4-6 weeks during storage. If it drops below 80%, give them a top-up charge. This prevents sulfation and maintains battery health.
Before returning the cart to service, give the batteries a full charge and check water levels. Clean the terminals and inspect all connections. This ensures your golf cart is ready for action when the season starts.
Consider using a battery maintainer for longer storage periods. These devices keep batteries at optimal charge levels without overcharging.
Frequently Asked Questions
Charging 8-volt golf cart batteries can be tricky. We've compiled answers to some common questions to help you power up your golf cart efficiently and safely.
What steps should I take to charge an 8 volt golf cart battery without a dedicated charger?
We recommend using a variable power supply set to 9 volts. Connect the positive and negative terminals correctly. Monitor the charging process closely to prevent overcharging. Stop when the battery reaches 8.8 volts.
Is it possible to user a 12 volt charger to charge an 8 volt golf cart battery?
It's not advisable to use a 12-volt charger for an 8-volt battery. The excess voltage can damage the battery or reduce its lifespan. We suggest investing in a proper 8-volt charger for optimal results.
What are the best chargers available for 8 volt golf cart batteries?
We've found the Lester Summit II and the Delta-Q QuiQ to be excellent choices. These chargers are specifically designed for golf cart batteries and offer features like automatic shut-off and multi-stage charging.
Can I use a 6 volt charger to charge my 8 volt golf cart battery?
A 6-volt charger won't provide enough power to fully charge an 8-volt battery. It may partially charge it, but we don't recommend this approach. Using the correct voltage is crucial for battery health and performance.
How can I charge multiple 8 volt batteries in series?
Connect the batteries in series, maintaining the same order each time. Use a charger with the correct voltage for the entire battery bank. For example, three 8-volt batteries in series would require a 24-volt charger.
What methods are effective for reviving a dead 8 volt golf cart battery?
We can try a few techniques. First, apply a low-amp charge for several hours. If that doesn't work, try desulfation with a specialized charger. In some cases, adding distilled water to the cells can help if the electrolyte level is low.